Quickstart

This is a secure Notification Sensor for XXXQFrequencyName. To run this device please insert fresh 1 * CR123A batteries. To run this device please make sure the internal battery is fully charged. Fibaro Smoke Sensor inclusion:
1. Install the battery. Visual indicator will signal the Z-Wave network inclusion status (green - device included, red - device not included)
2. Make sure the device is located within direct range of the Z-Wave controller.
3. Set the main controller into the learning mode (see main controllers operating manual).
4. Quickly, triple click the B-button, located on Fibaro Smoke Sensors enclosure.
5. Fibaro Smoke Sensor will be detected and included in the Z-Wave network.


Important safety information

Please read this manual carefully. Failure to follow the recommendations in this manual may be dangerous or may violate the law. The manufacturer, importer, distributor and seller shall not be liable for any loss or damage resulting from failure to comply with the instructions in this manual or any other material. Use this equipment only for its intended purpose. Follow the disposal instructions. Do not dispose of electronic equipment or batteries in a fire or near open heat sources.

Product Description

The FIBARO Smoke Sensor is a universal, ultra-light, perfectly designed, optical Z-Wave smoke detector. Fire alarm is signaled by sound, visual indicator blinking and alarm reports sent to the other devices within Z-wave network. The optical sensor detects smoke at an early stage of fire, often before flames appear and temperature starts to rise significantly. Moreover, the device has a built-in temperature sensor, which is adjustable to allow detection of fire by exceeding given temperature threshold. The FIBARO Smoke Sensor is a battery powered device designed to be placed on the wall or ceiling. Visual indicator signals fire, operating mode and it is used to check if the device is within the Z-wave network using a built-in Z-Wave range tester. The Smoke Sensor is designed to operate in confined spaces, under normal conditions (lacking of smoke, dust or condensed water vapor).

Installation

 Basic activation

  1. Turn the cover counter-clockwise and open it
  2. Remove the battery blocker
  3. Install the sensor’s cover in desired location
  4. Screw the FIBARO Smoke Sensor into the cover
  5. Add the device 
  6. Test FIBARO Smoke Sensor’s operation by performing a self-test – press & hold the B-button
  7. Test the Z-Wave network range assuring the device is within range

Installation notes

  1. Make sure the alarm sound can be easily audible in other rooms in the building.
  2. Install the sensor in already decorated, painted rooms.
  3. Install the sensor at least 1.5m from air conditioners.
  4. Do not install the sensor in direct sunlight. Keep at least 0.5m distance from light sources.
  5. Do not install the sensor in places prone to drafts.
  6. Do not install the sensor in places with high water vapor condensation, e.g. above stoves, ovens, kettles, etc. The device can not be installed in places where the temperature exceeds operational values (0°C – 55°C).

Product Usage

Visual LED indicator

FIBARO Smoke Sensor is equipped with a LED diode, signalling sensor’s operating modes and alarms. In addition the visual indicator may inform of the Z-Wave network range or exceeding the temperature threshold.

Visual indicator signalling modes:

  • Indication of alarms
  • Added device status is signalled by a single green blink while inserting the battery
  • Removed device status is signalled by a single red blink while inserting the battery
  • Software update procedure is signalled by blinking in cyan
  • Successful software update is signalled with glowing in green
  • Unsuccessful software update is signalled with glowing in red
  • MENU levels are signalled with glowing in certain colour


FIBARO Smoke Sensor is equipped with the MENU providing direct control over the device.

Press and hold the B-button for at least 3 seconds to enter MENU (visual indicator will glow white).
Release the B-button – visual indicator will start changing colours in the sequence.

Inside MENU, each of the positions will be signalled with a LED colour:

  • WHITE – entering MENU confirmation
  • GREEN – sending device state to associated devices
  • VIOLET – Z-Wave network’s range test
  • YELLOW – device reset

Confirm your choice with the B-button click.


Range test

FIBARO Smoke Sensor has a built-in Z-Wave network main controller’s range tester.

To make Z-Wave range test possible, the device must be added to the Z-Wave controller. Testing may stress the network, so it is recommended to perform the test only in special cases.

Follow the below instructions to test the main controller’s range:

  1. Press and hold the B-button
  2. Wait for the visual indicator to glow white and short acoustic signal to sound
  3. Release the B-button
  4. Wait for the visual indicator to glow violet
  5. Press the B-button again, briefly
  6. Visual indicator will indicate the Z-Wave network’s range (range signalling modes described below)
  7. To exit Z-Wave range test, press the B-button briefly

Z-Wave range tester signalling modes:

Visual indicator pulsing green – Smoke Sensor attempts to establish a direct communication with the main controller. If a direct communication attempt fails, the device will try to establish a routed communication, through other modules, which will be signalled by visual indicator pulsing yellow.
Visual indicator glowing green – Smoke Sensor communicates with the main controller directly.
Visual indicator pulsing yellow – Smoke Sensor tries to establish a routed communication with the main controller through other modules (repeaters).
Visual indicator glowing yellow – Smoke Sensor communicates with the main controller through the other modules. After 2 seconds the device will retry to establish a direct communication with the main controller, which will be signalled with visual indicator pulsing green.
Visual indicator pulsing violet – Smoke Sensor does communicate at the maximum distance of the Z-Wave network. If connection proves successful it will be confirmed with a yellow glow. It is not recommended to use the device at the range limit.
Visual indicator glowing red – Smoke Sensor is not able to connect to the main controller directly or through another Z-Wave network device (repeater).

Note: Communication mode of the Smoke Sensor may switch between direct and one using routing, especially if the device is on the limit of the direct range.

Fire detection


FIBARO Smoke Sensor responds to the physical presence of a smoke. The device checks every 10 seconds for a smoke. Once the level of smoke exceeds value set in advanced parameter 1, Smoke Sensor triggers an alarm.

Optical smoke detector used in FIBARO Smoke Sensor has 3 levels of sensitivity, compliant with EN 14604:2005. By default, the detector is set to the middle sensitivity level. Sensitivity level depends on the parameter 1 settings (modified only through the main Z-Wave controller).

Fire alarm is signaled by:

  • sending an appropriate alarm command to the Z-Wave controller
  • sending an appropriate alarm command to associated devices
  • intermittent sound
  • visual indicator blinking red

Once the fire alarm has ceased, the sensor checks whether the smoke has actually disappeared before getting back to normal operation, i.e. performing a self test each 10 seconds and checking for presence of smoke.

Note: FIBARO Smoke Sensor is a multiple use device, however, for greater safety, it is recommended to replace the device with a new one after a fire occurrence.

Note: If fire alarm is triggered, but the level of smoke did not exceed concentration equal to three times of the sensitivity set in parameter 1 (the individual levels of sensitivity are printed on the device casing), user can mute sound alarm by holding the B-button (temporarily reducing the sensor’s sensitivity).

Note: Visual indicator will still indicate an alarm state by blinking red. If smoke level concentration is greater than three times of the sensitivity set in parameter 1, mute will automatically turn off and the device will alarm fire again (using visual and audible indicator).

Excess temperature detection


Apart from detecting presence of smoke, FIBARO Smoke Sensor has an additional function of informing of exceeding the programmed temperature threshold. The function is disabled by default in parameter 2 settings.

Excess temperature warning is defined by user in parameter 30 – set to 55°C by default. Excess temperature level can be also signaled by visual indicator glow (parameter 3) and short beep (parameter 4). Parameter 20 should not be set to 0 because such setting disables temperature measurements.


Malfunction detection

FIBARO Smoke Sensor can automatically detect a malfunction. The device performs a test every 10 seconds. If malfunction is detected (e.g. damaged smoke chamber) an intermittent sound signal will start and alarm will be sent to the Z-Wave network controller.

Once trouble alarm has been detected, it is recommended to dismount the sensor and:

  • check the power source (replace battery)
  • check whether the Smoke Sensor is exposed to direct light

Note: If a malfunction alarm is continually reported, it is recommended to replace FIBARO Smoke Sensor with new one or contact with guarantor if the product warranty is still valid.

Self-test may be triggered manually:

  1. Make sure the device is powered
  2. Press and hold the B-button
  3. The visual indicator will glow white and the short alarm will sound
  4. Keep holding the B-button
  5. After 3 seconds from the first beep smoke chamber operation will be checked

Triggering fire alarm and beep mean positive result and should occur within 10 seconds. No fire alarm means that the sensor is malfunctioning.

Note: When the self-test is triggered manually the Smoke Sensor sends control command to the Z-Wave network controller. The procedure will be performed at least as long as the B-button is not released (will be completed in up to 10 seconds after releasing the B-button).

Note: Any service or repair must be carried out by the manufacturer. The expiry date of the device is indicated on its back.

Lack of Z-Wave range detection

When included in the Z-Wave network, FIBARO Smoke Sensor tests the network communication. By default the procedure is performed at each temperature report depending on parameters 20 and 21 settings. In addition, Z-Wave network communication test is performed during waking up. Lack of the Z-Wave network communication may be signaled by an intermittent alarm sound and visual indicator blinking violet.

By default sound and visual signals are disabled but you can enable it by changing values of parameters 3 and 4.

Once a FIBARO Smoke Sensor has reported no Z-Wave network communication, it is recommended to wake up the device by clicking the B-button. If it does not stop the alarm, Z-Wave networks operation and the main controllers operation need to be verified.

FIBARO Smoke Sensor will cancel the Z-Wave network communication alarm once it communicates with the network after manual or automatic wake up.

Reset to factory default 1. Make sure the device has the battery installed.
2. Press and hold the B-button for 3 seconds. Visual indicator will glow white.
3. You will hear a short signal.
4. Release the B-button.
5. Wait until the visual indicator glows yellow, signaling entering the 4th menu level.
6. Press the B-button briefly to confirm menu level choice. At the same time you will hear a short beep, the same sound as during the power connection. Successful reset will be confirmed with the visual indicator changing colour to red and fading. At the same time, short beep will sound, same as at the power connection.
Inclusion Quickly, triple click the B-button, located on Fibaro Smoke Sensors enclosure.
Exclusion Quickly, triple click the B-button, located on Fibaro Smoke Sensors enclosure.
NIF XXXNIF
Wakeup

Available settings: 0 or 21 600 – 65 535 (in seconds, 6h – 18h)
Default setting: 21 600 (6h)
At each wake up Smoke Sensor communicates with the main controller, updates parameters settings and the software if necessary. The Smoke Sensor will wake up at defined time interval and will ALWAYS try to communicate with the main controller. After each failed communication attempt, the sensor will retry to establish connection with the main controller after 60 seconds. After 3 failed attempts, the lack of the Z-Wave range alarm will be triggered. Longer time interval means less frequent communication and thus a longer battery life. The Z-Wave range alarm will be cancelled automatically, after first successful connection. Change of wake up interval value does not affect alarms or trouble signals operation.


Setting to 0 disables sending Wake Up Notification frame. Wake up may be still performed manually by a single B-button click or by sending Node Info frame (triple click the B-button).

Protection XXXProtection
FirmwareUpdate XXXFirmwareUpdate
SetAssociation XXXSetAssociation

Association Groups:

Group Number Maximum Nodes Description
1 1 Z-Wave Plus Lifeline.
2 5 Trigger: Smoke alarm - association group, value depends on the configuration. Type of frame sent by the device when the association group is activated: BASIC_SET.
3 5 Trigger: Tamper - association group. Type of frame sent by the device when the association group is activated: NOTIFICATION_REPORT.
4 5 Trigger: Smoke alarm ZW3 - association group for ZW3 backward compatibility. Type of frame sent by the device when the association group is activated: SENSOR_ALARM_REPORT.
5 5 Trigger: Tamper ZW3 - association group for ZW3 backward compatibility. Type of frame sent by the device when the association group is activated: SENSOR_ALARM_REPORT.

Configuration Parameters

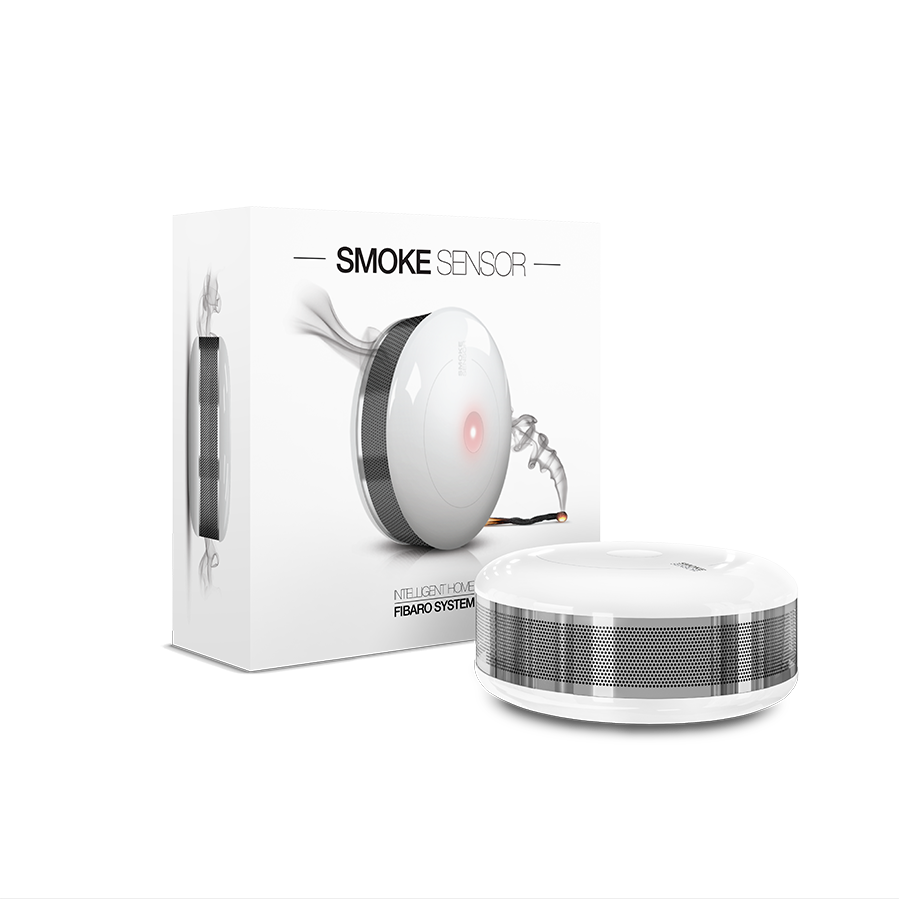
Parameter 1: Fibaro Smoke Sensor sensitivity

There are 3 levels of sensitivity to smoke presence. Level 1 means the highest sensitivity. Rising the parameter value lowers the sensitivity to smoke presence.
Size: 1 Byte, Default Value: 2

Setting Description
1 HIGH Sensitivity
2 MEDIUM Sensitivity
3 LOW Sensitivity

Parameter 2: Z-Wave notifications status

This parameter allows to activate excess temperature and/or enclosure opening notifications sent to the main controller.
Size: 1 Byte, Default Value: 0

Setting Description
0 all notifications disabled
1 enclosure opening notification enabled
2 exceeding temperature threshold notification enabled
3 all notifications enabled

Parameter 3: Visual indicator notifications status

This parameter allows to activate visual indications but does not apply to major alarms, such as FIRE, TROUBLE and LOW BATTERY ALARM.
Size: 1 Byte, Default Value: 0

Setting Description
0 all notifications disabled
1 enclosure opening notification enabled
2 exceeding temperature threshold notification enabled
4 lack of Z-Wave range notification

Parameter 4: Sound notifications status

This parameter allows to activate sound signals but does not apply to major alarms, such as FIRE, TROUBLE and LOW BATTERY ALARM.
Size: 1 Byte, Default Value: 0

Setting Description
0 all notifications disabled
1 enclosure opening notification enabled
2 exceeding temperature threshold notification enabled
4 lack of Z-Wave range notificatio

Parameter 10: Configuration of control frames in BASIC command class

This parameter defines which frames will be sent in the 2-nd Association Group (FIRE ALARM). The values of BASIC ON and BASIC OFF frames may be defined as described in further parameters.
Size: 1 Byte, Default Value: 0

Setting Description
0 BASIC ON & BASIC OFF enabled
1 BASIC ON enabled
2 BASIC OFF enabled

Parameter 11: BASIC ON frame value

BASIC ON frame is sent in case of smoke presence detection and Fire Alarmtriggering. Its value is defined by the parameter.0 turn off the device.
Size: 2 Byte, Default Value: 255

Setting Description
0 - 99 set the device to 1-99%
255 set the last status

Parameter 12: BASIC OFF frame value

BASIC OFF frame is sent in case of Fire Alarm cancellation. Its value is defined by the parameter.0 turn off the device1-99 set the device to 1-99%255 set the last status
Size: 2 Byte, Default Value: 0

Setting Description
0 - 99 set the device to 1-99%
255 set the last status

Parameter 13: Alarm broadcast

A value other than 0 means that alarms are being sent in broadcast mode, i.e. to all devices within a FIBARO Smoke Sensor’s range.
Size: 1 Byte, Default Value: 0

Setting Description
0 broadcast inactive
1 FIRE ALARM broadcast (2nd & 4th Association Group) active; enclosure opening notification broadcast (3rd & 5th Association Group) inactive
2 FIRE ALARM broadcast (2nd & 4th Association Group) inactive; enclosure opening notification broadcast (3rd & 5th Association Group) active
3 FIRE ALARM broadcast (2nd & 4th Association Group) active; enclosure opening notification broadcast (3rd & 5th Association Group) active.

Parameter 20: Temperature report interval

Time interval between consecutive temperature reports.
Report is sent when new temperature value is different from the one previously reported – according to the set hysteresis (parameter 21). Temperature reports can be also sent as a result of polling.

Size: 2 Byte, Default Value: 1

Setting Description
0 reports inactive
1 - 8640 [10s-24h] Default setting: 1 (10 seconds)

Parameter 21: Temperature report hysteresis

The temperature report will only be sent if there is a difference in temperature valuefrom the previous value reported, defined in this parameter (hysteresis).Temperature reports can be also sent as a result of polling.
Size: 1 Byte, Default Value: 10

Setting Description
1 - 100 (multiply by 0.1) [0.1°C – 10°C] Default setting: 10 (1°C)

Parameter 30: Temperature threshold

Temperature value measured by the built-in temperature sensor above which the excess temperature notification is sent (visual indication/sound/Z-Wave report). CAUTION: Parameters 30, 31 and 32 are associated with parameters 2, 3 and 4 settings. Their modification may have no effect if configured functionality is not activated in the corresponding parameter.
Size: 1 Byte, Default Value: 55

Setting Description
1 - 100 (1°C – 100°C)

Parameter 31: Excess temperature signaling interval

Time interval of signaling (visual indication/sound) excess temperature level. CAUTION: Parameters 30, 31 and 32 are associated with parameters 2, 3 and 4 settings. Their modification may have no effect if configured functionality is not activated in the corresponding parameter.
Size: 2 Byte, Default Value: 1

Setting Description
1 - 8640 (multiply by 10 seconds) [10s-24h]

Parameter 32: Lack of Z-Wave range indication interval

Time interval of signaling (visual indication/sound) lack of Z-Wave range. CAUTION: Parameters 30, 31 and 32 are associated with parameters 2, 3 and 4 settings. Their modification may have no effect if configured functionality is not activated in the corresponding parameter.
Size: 2 Byte, Default Value: 180

Setting Description
1 - 8640 (multiply by 10 seconds) [10s-24h]

Technical Data

Dimensions 65x65x28 mm
Weight 42 gr
Hardware Platform ZM5202
EAN 5902020528265
IP Class IP 20
Battery Type 1 * CR123A
Device Type Notification Sensor
Network Operation Reporting Sleeping Slave
Z-Wave Version 6.51.06
Certification ID ZC10-15070004
Z-Wave Product Id 0x010F.0x0C02.0x1002
Frequency Europe - 868,4 Mhz
Maximum transmission power 5 mW
EuropeNotification Sensor